Sign-in, SSO & SCIM
Require two-factor authentication and set up SAML 2.0 single sign-on and SCIM user provisioning through one Microsoft Entra enterprise application
On the page Organization settings → Security & compliance → Sign-in & SSO you decide how the members of your organization sign in: whether they must set up two-factor authentication and whether sign-in runs through your identity provider.
Route sign-in through your identity provider with SAML 2.0 single sign-on, and keep your member list in sync automatically with SCIM provisioning if you like. Both run on a single Microsoft Entra enterprise application: you create it once for SSO, then turn on SCIM for the same application.
SSO and SCIM are available to every business organization, including Business trials and Enterprise organizations. You need the permission Manage organization settings. The two settings pages are called Sign-in & SSO and SCIM Provisioning and sit in the group Security & compliance of the organization settings.
Require two-factor authentication

With Require two-factor authentication, every member must set up two-factor authentication before they can use the app. You can only turn it on after enabling two-factor authentication on your own account.
When you confirm with Require, every member without two-factor authentication is signed out immediately, including in the mobile, desktop and Office apps. They can only use the app again after completing the setup. Members who already use it stay signed in.
If a member loses access to their authenticator app, reset their two-factor authentication on their page under Members.
Members see the requirement in their settings under Security, marked Set by your organization, and can then no longer switch two-factor authentication off.
1. Create the enterprise application in Microsoft Entra
- Sign in to the Microsoft Entra admin center.
- Go to Identity → Applications → Enterprise applications → New application → Create your own application.
- Name it (for example "DeutschlandGPT"), choose Integrate any other application you don't find in the gallery (Non-gallery), and create it.
You configure SAML SSO on this application below. If you use SCIM, it runs on the same application.
2. Configure SAML single sign-on
Verify a domain (in DeutschlandGPT)
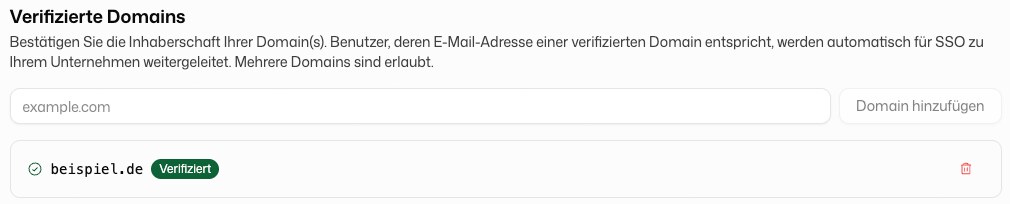
SSO stays locked until at least one domain is verified. On the Sign-in & SSO page, add each domain your users sign in with under Verified Domains (for example example.com). Publish the TXT record shown (DNS Name and TXT Value) at your DNS provider and click Check. Users whose email address matches a verified domain are routed to your organization for SSO.
| Action | Description |
|---|---|
| Add domain | Enter a domain, then copy the TXT record to your DNS provider |
| Check | Run a fresh DNS lookup once the record is published |
| Remove | Remove a verified domain. Only possible while SSO is disabled |
Register DeutschlandGPT in Entra
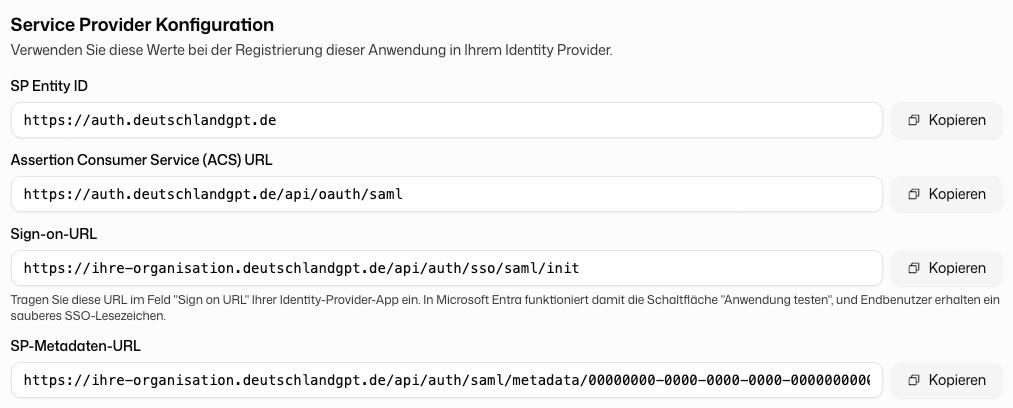
In your enterprise application, open Single sign-on → SAML and fill in the Basic SAML Configuration with the read-only values from the card Service Provider Configuration on the SSO page:
| Entra field (Basic SAML Configuration) | DeutschlandGPT value |
|---|---|
| Identifier (Entity ID) | SP Entity ID |
| Reply URL (ACS URL) | Assertion Consumer Service (ACS) URL |
| Sign on URL | Sign on URL |
The card also shows the SP Metadata URL, in case your identity provider can read the configuration from it.
Connect your identity provider (in DeutschlandGPT)
Fill in the card Identity Provider Configuration. The quickest way is Import from metadata URL: paste your Entra app's federation metadata URL and the SSO URL, entity ID and certificate are filled in for you. You can also enter the values by hand.
| Field | Description |
|---|---|
| IdP SSO URL | Your IdP's SAML 2.0 endpoint |
| IdP Entity ID | The issuer or entity ID from your IdP |
| IdP Signing Certificate (PEM) | The signing certificate including its BEGIN/END lines, or use Upload certificate file |
| IdP Metadata URL (optional, for reference) | Stores the metadata URL so you can find it again when the certificate rotates |
Click Save configuration.
Enable SSO
Click Enable SAML 2.0. You need a verified domain, and you confirm two statements: the configuration is complete, and every user who needs access is assigned in the identity provider.
Sign-in through the IdP can only be tested once SSO is enabled. Your current session stays active, so proceed like this:
- Keep the SSO page open in your signed-in browser window and click Enable SAML 2.0.
- Open a private browser window and sign in with an address on your verified domain. Alternatively, run Test this application in Entra, provided the Sign on URL is entered.
- If sign-in fails, click Switch to email & password login in the first window. Your users sign in as before, and you can correct the configuration.
Existing sessions stay active; new sign-ins go through the IdP. To end current sessions immediately, use Force logout all users below. Only do that once the test has succeeded, because it ends your own session too.
Which role new members get on their first SSO sign-in is set on the Members page under Role on first sign-in (SSO).
3. Enable SCIM provisioning (same application)
SCIM keeps your member list in sync automatically. New employees are created the moment they are assigned in Entra, and departing ones are deactivated. SCIM requires SSO. Set up SSO first and reuse the same enterprise application. Without SSO, the SCIM page only shows Single Sign-On required with a link to Set up Single Sign-On.
While SCIM is active, the Users page shows SCIM user management active. Inviting and editing members happens in Entra, not in DeutschlandGPT.
Create the SCIM token (in DeutschlandGPT)
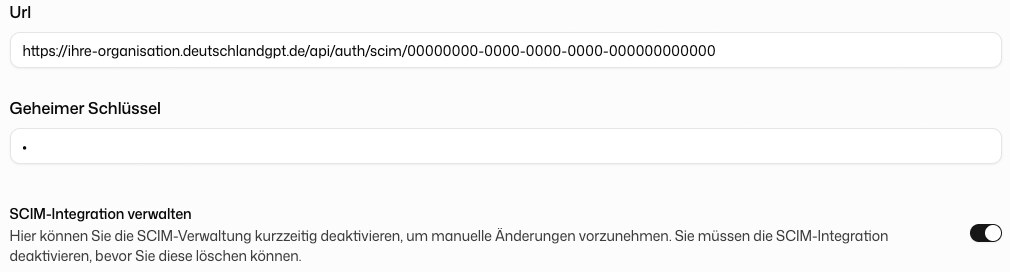
Open SCIM Provisioning, keep Microsoft Entra ID selected and click Create. The dialog SCIM secret key shows the token once. Store it safely, because you cannot view it again. The page then shows the URL (the tenant URL for Entra) and the masked Secret token.
Connect Entra to DeutschlandGPT
In your enterprise application, open Provisioning → Connect your application and enter:
- Tenant URL: the URL from DeutschlandGPT.
- Secret Token: the secret token from DeutschlandGPT.
- Click Test connection, then Save.
Attribute mapping
Open Provisioning → Mappings → Provision Microsoft Entra ID Users. Keep only the mappings below and delete every other default mapping. Entra ships extras, such as the employee ID, that DeutschlandGPT ignores.
| DeutschlandGPT (SCIM) attribute | Entra source |
|---|---|
| userName | userPrincipalName |
| active | Switch([IsSoftDeleted], , "False", "True", "True", "False") |
| displayName | displayName |
| emails[type eq "work"].value | mail |
| name.givenName | givenName |
| name.familyName | surname |
| name.formatted | Join(" ", [givenName], [surname]) |
| externalId | mailNickname |
Save the mappings, assign the users and groups you want provisioned to the application, then set provisioning On.
Pause or remove SCIM
The switch Manage SCIM integration pauses SCIM, for example when you need to make manual changes in DeutschlandGPT. To remove SCIM for good, pause it first and then click Delete SCIM integration. This cannot be undone. Also switch off or delete the provisioning on the Entra side.
Below the settings, a table lists recent SCIM activity with Resource, Action, Details and Timestamp.
Departing employees (deprovisioning)
When you remove the app assignment in Entra, disable the account or delete the user, SCIM deactivates the account in DeutschlandGPT and releases the licence it held. The member stays in the list with the status Inactive. Inactive members cannot sign in and use no licence.
An inactive account can be deleted permanently on the Members page (permission Remove members from the organization). Deleted accounts lose all access immediately and are removed for good, together with their data, after 30 days. Until then you can bring a deleted account back with Restore under the status filter Deleted. While SCIM is active, it returns as an inactive account.
While SCIM is active, only members that have already been deprovisioned in Entra (status Inactive) can be deleted. Revoke access in Entra first. Otherwise the next synchronisation simply creates the account again.
Signatures (optional hardening)
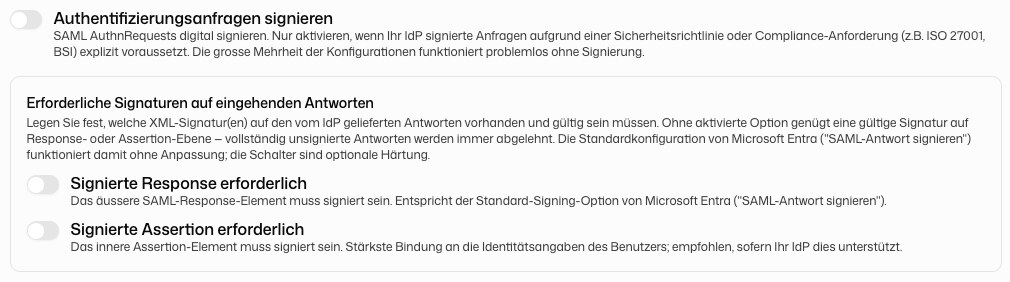
Sign authentication requests signs the SAML requests DeutschlandGPT sends to your IdP. Leave it off unless your IdP explicitly requires signed requests. The switch is greyed out when the platform has no signing key.
Required signatures on incoming responses decides which signatures the IdP's answer must carry:
- Require signed Response: the outer SAML Response must be signed. This matches Microsoft Entra's default ("Sign SAML response").
- Require signed Assertion: the inner Assertion must be signed. This binds the signature most tightly to the user's identity claims.
With neither option ticked, a valid signature on either the Response or the Assertion is enough. Completely unsigned responses are always rejected.
Force logout all users
Force logout all users ends every active session in the organization at once. Use it after a suspected credential leak or to enforce a policy change. Before you do, make sure SSO is tested and every member who needs access is assigned in the identity provider, or they may not get back in.